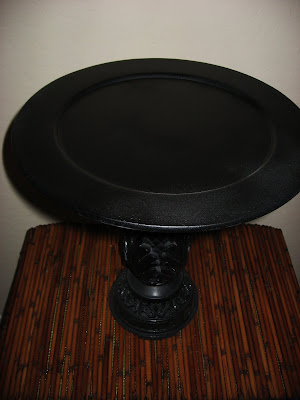


Looking for a dramatic fall centerpiece for your table or entry? Here is a fun idea. Start with a large black cake pedestal to give it some height and drama. You can find them on line for purchase. I actually found one similar to the one I made listed for $80! If you live on a budget like me, you can follow these easy instructions and make your own. The total cost of mine was $8 plus my spray paint...so as you can see that was quite a savings!
Basically you need a large round tray or plate and something for a base. True to form, I browsed the thrift stores for these items. As a matter of fact, I actually purchased mine at a local thrift store yesterday. The plate, which was a pretty ugly silver painted charger plate, cost me $1.99. For the base I love to use my imagination because actually anything goes. If you want to keep it simple, a large candlestick is probably the easiest source. Believe me, you can find all sorts of them if you are looking for one. You may already have one in in your storage. Mine cost only $5.99. Is there any question why I love to shop thrift stores?
Clean both pieces of extra dust and oils and then spray lightly with a primer paint. This may seem unnecessary, but the final product will have a much nicer finish when you use a primer and it will be less likely to chip. Then, for a Halloween or fall arrangement I like to use a matte or flat black spray paint. You can use a satin finish, but anything glossy will take away from the focal point of the arrangement. When both pieces are dry, glue them together with a good household glue. I like epoxy as it holds up the best.
The key to an interesting centerpiece is thinking in terms of levels...ie, lifting the eye up from the base or tabe to the top of the arrangement. This is why the cake pedestal works so well.
I have included two pictures of very easy, quick arrangements I that I pulled together with just the things I had around from previous years. I used artificial pumpkins, but real ones would work beautifully. Personally, I think my looks every bit as good as the expensive ones on line. The important thing is to just have fun and enjoy the challenge...

No comments:
Post a Comment